

Well I am just back from a 3 day Stampin' Up! event in Brisbane called OnStage. Join my team to get access to exclusive events like this where you get to see the new catalogues way before everyone else and learn lots of fantastic new techniques and tips. Check back tomorrow when I will be allowed to show you some fabulous new products.
One of the best things about attending events like this is to meet and catch up with Stampin' Friends from around the world. I had lots of fun with my teammate Megan Lenske and I got to meet lots of people I mix with online but have not met in person. It was really great to catch up with the lovely Kelly Kent and her team member Kristel.
 |
| Megan and I (I'm on the right)......excited faces..... |
 |
| .........and serious model faces. Pulling it off?????? |

I spent every spare minute I had making these and should have taken a few photos before I swapped them all. They looked really great altogether - ahhh hindsight! At least I kept 1 for myself.

They are
actually easy to make. Here's how!
You will
need:
·
1 x 5 cm round mint tin with clear lid - purchased from Wholesale Wedding Superstore here on the Sunshine Coast - you can order online as well.
·
45 cm ribbon for hanger
·
25 cm ribbon for bow
·
Cardstock
·
1 ¾” circle punch or Layering Circles framelits
·
Merriest Wishes stamp set and Merry Tags
thinlits
·
Black Stazon ink
·
Stazon cleaner
·
Mica flakes, microbeads and Dazzling Diamonds
·
Baby powder
·
Loctite Gel Control super glue for sealing the
tin and securing bow
·
Foam adhesive strips
·
Clear Wink of Stella
1. Stamp the ‘Deck the halls’ sentiment on the tin
lid with Stazon. How fortuitous that it was the perfect size!
Secret tip for perfect alignment: Position lid in a small square box and secure with something to stop it from moving. This is a bit like a Stamp-a-ma-jig.

Place a square of
window sheet or acetate over the lid into the corner so you can make sure your
sentiment is perfectly lined up. When you stamp make sure your stamp block is flush with the corner of the box. If you are a bit off move the stamp slightly. Try again
without reinking. When you are happy with the position remove the acetate and
stamp on each lid. I did a production line.
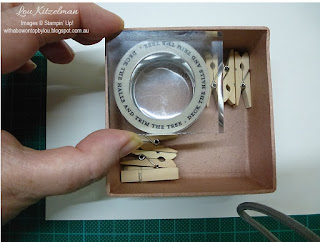
Secret tip for perfect alignment: Position lid in a small square box and secure with something to stop it from moving. This is a bit like a Stamp-a-ma-jig.

Secret tip If you don’t like the
stamped image, use the Stazon cleaner to remove the ink from the tin and start
again.
2. Die cut 2 of the reindeer and tree thinlit – one
in Copper foil sheet and 1 in Mint Macaron cardstock.
3. Trim the bottom curve off the Mint Macaron piece
(use the impression from the die as a guide) and the reindeer. Colour the trees
in with Clear Wink of Stella.
4. Trim a bit more of the bottom of the copper
piece off and remove the trees.

5. Adhere the Mint Macaron piece into the tin base
using a double layer of foam adhesive strips (2 adhered together). Tweezers
help with this. Remember that there is a border around the lid so make sure your trees and reindeers are in view.
6.
Add the reindeer layer over the top but only use
a single layer of foam adhesive strips.
7. Make your shaker mix. I used equal parts of
white mica flakes, Dazzling Diamonds and micro beads with a pinch of gold mica
flakes. Add it little by little until you are happy with the amount.
Secret tip Add a tiny sprinkle of
baby powder to your mix. Be careful as too much will stick to your clear lid
and make it appear cloudy. This stops the shaker mix getting static and sticking
to your lid and adhesive strips.

8. Place 2 dabs of Loctite to the outside of the
tin top (where the lid will sit) and secure the lid on, making sure you
position your words correctly. Please try not to glue your fingers to the lid! Don’t
ask why I feel the need to warn others about this!
9. Add a small piece of double sided tape to the top
and bottom of the tin outside – just under the lid. Adhere the longer piece of
ribbon around, tying a double knot at the top and then knot the 2 ends together
to make a hanger. Adhere the bow on – I used the Loctite glue.

10.
You can use a framelit or punch to cut out a
circle for the back of the tin for your Christmas message.
11.
Hang it up and sit back and admire it!

Thank you to all who made OnStage such a fabulous event. 6 months until the next one!
Product List


 Natural Trim")
 Ruched Ribbon")
 Ruched Ribbon")
These are fantastic Lou! I wish I had this set now! Nice of you to share step by step - really like the tip with the baby powder.. I'll have to remember that!
ReplyDeleteWe had so much fun!! As soon as our tree goes up your beautiful decoration will have pride of place. A beautiful memento of my very first OnStage, thanks for making it awesome!
ReplyDelete